Requirement
Configure High availability Nagios monitoring system. In a case of nagios system failure such as service unavailable or server failure. Also communications between Nagios and nrpe clients should be continue with related dynamic changes.
What is Nagios?
Currently Nagios is the main health monitoring tool in Incentivio. It is used to monitor URL/System metrics, Application health, etc…
What is nrpe agent?
Nrpe is the agent of Nagios which is collecting systems metrics such as CPU,Hard Disk Usage. In this following task we need to update the configuration file of nrpe also.
Solution:
For keep the high variability,
There is a auto scaling group in placed and it has setup for 1 server. So the next challenge was to allow the Nagios IP in nrpe client configuration file. Because, in auto scalling we can’t keep any specific or static IP.
There were 3 main solution to achieve above requirement,
1. Create a network interface pool with 2 network interfaces and auto scaling manager will select the free one.(it would be okay even if the current ip switch to other one.)
2. Create an ELB and route outbound traffic via the LB and white list the LB endpoint.
- Change allowed host IP to CIDR block in nrpe.cfg
For this task 3rd option would be the suitable one.
Task Plan
Tasks | Time estimation |
Testing | |
| 5hrs less than 1hr 2hrs |
Pre-cutover | |
add to changes to running env
update all nrpe agent in prod env to 192.168.0.0/16
| less than 1 hr less than 1 hr 3hrs 1hr |
Cutover | |
verification
| less than 1 hr less than 1 hr |
Pre-cutover activities
Update nrpe config file in all servers in below list.
nrpe agent config path: /etc/nagios/nrpe.cfg
Mount EFS to sync nagios cfg files
In the case of converting static server to AS server, There is a challenge to over-come any time. which is finding a solution to make necessary config file changes when we need.So as a solution for this, mounting EFS is efficient rather than creating AMI for every file change.Mounting EFS- Mount where?
- /usr/local/nagios/etc/conf.d
Above location included all the monitoring cfg files which ar using in nagios.So EFS will be mounted on that location.- How to mount?
- First we need to create EFS in AWS console.
Open the Amazon EFS Management Console at https://console.aws.amazon.com/efs/.Choose Create file system to open the Create file system dialog box.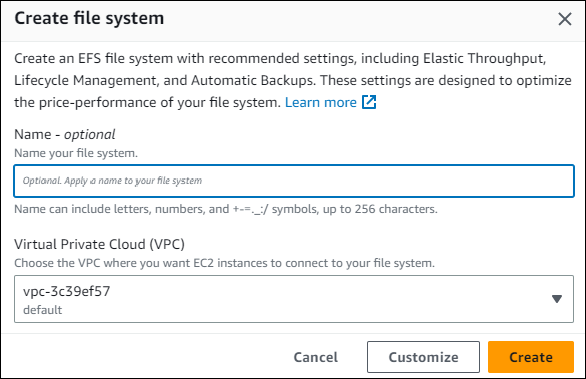 (Optional) Enter a Name for your file system.For Virtual Private Cloud (VPC), choose your VPC, or keep it set to your default VPC.For Availability and Durability, choose one of the following:
- Regional to create a file system that uses Standard storage classes. Standard storage classes store file system data and metadata redundantly across all Availability Zones within an AWS Region. Regional offers the highest levels of availability and durability.
- One Zone to create a file system that uses One Zone storage classes. One Zone storage classes store file sytem data and metadata redundantly within a single Availability Zone which makes it less expensive than Standard storage classes.
- Because EFS One Zone storage classes store data in a single AWS Availability Zone, data stored in these storage classes may be lost in the event of a disaster or other fault that affects all copies of the data within the Availability Zone, or in the event of Availability Zone destruction resulting from disasters, such as earthquakes and floods.
If you choose One Zone, choose the Availability Zone that you want the file system created in, or leave the default setting.
Note
One Zone storage classes are not available in all Availability Zones in AWS Regions where Amazon EFS is available.
Choose Create to create a file system that uses the following service recommended settings:
- Automatic backups turned on, for more information, see Using AWS Backup to back up and restore Amazon EFS file systems.
- Mount targets – Amazon EFS creates mount targets with the following settings:
- For file systems that use Standard storage classes, a mount target is created in each Availability Zone in the AWS Region in which the file system is created. For file systems that use One Zone storage classes, a single mount target is created in the Availability Zone you specified.
- Located in the default subnets of the VPC you selected.
- Using the VPC's default security group – You can manage security groups after the file system is the created.
- For more information, see Managing file system network accessibility.
- General Purpose performance mode – For more information, see Performance modes.
- Bursting throughput mode – For more information, see Throughput modes.
- Encryption of data at rest enabled using your default key for Amazon EFS (aws/elasticfilesystem) – For more information, see Encrypting data at rest.
- Lifecycle Management – Amazon EFS creates the file system with the following lifecycle policies:
- Transition into IA set to 30 days since last access
- Transition out of IA set to On first access
- For more information, see Amazon EFS lifecycle management.
After you create the file system, you can customize the file system's settings with the exception of availability and durability, encryption, and performance mode.
If you want to create a file system with a customized configuration, choose Customize. For more information about creating a file system with customized settings, see Creating a file system with custom settings using the Amazon EFS console.
The File systems page appears with a banner across the top showing the status of the file system you created. A link to access the file system details page appears in the banner when the file system becomes available.

After that, install efs-utils in server
sudo yum install -y amazon-efs-utilsThen, mount the efs on temporary location and and copy all cfg files to there.
sudo mount -t efs -o tls fs-0a5f4fd9085d2f7ab:/ efscp /usr/local/nagios/etc/conf.d/* efsThen add efs mount to fstab and restart the server.
vim /etc/fstabadd this entry to fstab
fs-0a5f4fd9085d2f7ab:/ /usr/local/nagios/etc/conf.d efs defaults 0 0Final result:
LABEL=/ / ext4 defaults,noatime 1 1tmpfs /dev/shm tmpfs defaults 0 0devpts /dev/pts devpts gid=5,mode=620 0 0sysfs /sys sysfs defaults 0 0proc /proc proc defaults 0 0fs-0a5f4fd9085d2f7ab:/ /usr/local/nagios/etc/conf.d efs defaults 0 0and restart the server.
Then, Create an AMI from current running nagios server and attach it Launch template.


No comments:
Post a Comment